I just finished a trio of pieces for a crafter fair coming up locally. And I do believe that I've settled on a "look" - oak and mahogany. Those of you who follow this blog saw this coming. I'm sure. I will still be making my "tattoo benches" though, now poplar will be the wood of choice. Goodbye pine, it was fun learning with you.
The first of the objects in this suite of three is a classic 19th-century candle lantern. Though I've been making these for some time now, this is the first in my new woods of choice.
Included in the design are the square mahogany pegs that characterize my work. In this instance they are purely decorative.
To light, or extinguish the candle, one needs merely to elevate the candle toward the chimney hole by using the dowel and platform.
I was somewhat surprised at how many hours this small project took. The dimensions of the panes of glass make the depth of the kerfs critical.
The "go slow" approach was essential in pulling this off.
The result is a nice blend of form following function.
Next came a bench. This is my second bench utilizing square pegs. The holes are cut on my Shopfox mortising machine.
I then clean the corners out with a small hand chisel.
One of the reasons that my benches are so sturdy is that I utilize both glue and screws to hold them together. Rather than having an exposed screw head, I cut a mortise halfway through the board and cut a correspond mahogany peg to cover the screw.
I cut my peg stock to the exact dimensions of the mortising chisel on my mortiser, insuring a perfect fit. I cut the pegs to the exact depth and...
now you see it...
now you don't.
The secret to successful gluing is adequate clamping. The glue under this pressure makes a bond that's stronger than the wood itself,
You can never have enough garlic, olive oil, or clamps.
When the clamps come off the finish sanding begins.
Funny, something I found so dreadfully tedious in shop class now seems so relaxing.
A light brush with some neutral Danish Oil to bring out the grain and voila!
Hey, couldn't you use a pair of these?
Next up in this trifecta is a two-step library step. I've made these before but this time I changed the design to enhance the stability.
I splayed the sides out by just 5 degrees which was plenty to provide this little step with a very stable and non-tippy base. It was odd to move from tablesaw to bandsaw to scrollsaw and have the blade or bed of each set off-square. I had to keep my wits about me to keep from cutting something backwards.
Assembly is identical to that of the bench.
Did I mention the thing about clamps?
After a light brush of Danish Oil I made the ceremonial first ascent.
As planned, very non-tippy!
This is a design that I am very pleased with.
Here, that five-degree splay is very evident, giving it, I think, a Roycrofter look, and I really like that.
Unlike the benches and lanterns, which are classic designs, this little library step is of my own design. I do try to add appropriate elements that will maintain the elegant simplicity of the piece while giving it personal touches that add to its design and functionality.
ramped cleats,
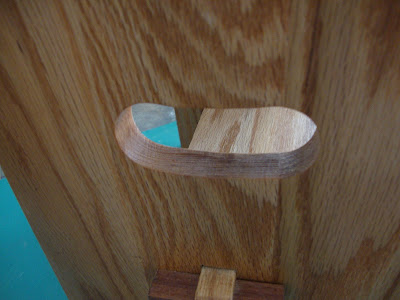
ergonomic hand-holds,
and my name and website.
Oak, glued, screwed, and clamped makes an extraordinarily stable and strong platform.
A ziggurat of good-taste for your library.
Oak and mahogany go together like Katz and Jammer.
Ready for the show.
Making the chips fly!
Mannie


