Thursday, March 29, 2012

Shop Season!

.

Finishing touches


With warm Spring breezes and longer days comes more opportunities to find myself out in the shop making cool things or thinking up cool things to make.

 This year's projects include illustrating and finishing last fall's five-board benches and making an additional nine more for a total of twenty.  The idea is to have a sale out of my driveway this summer.  I think that will be a fun experiment. and who knows? I might even sell some benches.

Bookends, with historic themes, are also on the agenda this season. More will be revealed as things progress.

This week I installed what I'm pretty sure will be my last machine, a little 1" x 36" Grizzly belt sander, perfect for detail work and smaller stuff.


I mounted it on a very sturdy wooden wall bracket, leveled it, hooked it up to the dust-collection system and turned it on.  Runs great, works perfect, makes no dust.  Boom!


Machinery row is now complete and the only thing that's missing from this picture...


is me!


I'll rectify that by this weekend.

Loving Spring, in the Cumberland Valley,

Mannie


.

Saturday, March 17, 2012

Small House repairs

.


Historic Home Preservation

A friend asked me to fabricate some missing pieces for her 1930s folk-art bungalow.


This looked like the perfect project to both kick off the shop season and to distract me from my homework; a win-win as they say.

Originally assembled with tiny brads, many of the components of this house were loose or missing entirely.

Using scrap wood, I first fabricated the missing railing and post.  


Once assembled, as a component, it was glued and clamped into place.


This was followed by tackling the missing chimneys.  By ripping a small piece of stock, I matched the dimensions of the chimneys based upon the pattern left in the paint by the originals.  I cut the resulting pieces at a 20-degree angle to match the pitch of the roof (fine tuning done on my sanding wheel).  Chimney caps, modeled off the one larger, original chimney, were cut and then beveled on my sanding wheel.  Everything got glued and clamped into place.


Aside from these major components, two smaller issues were taken care of; the cutting and shaping of a missing piece of window frame,


and the replacement of a small piece of missing wood on the front wall.


Once primed and painted, this will be up to the standards of those cool kit homes sold by Sears in the1920s and 30s.


Ready for occupancy.

Happy shop season!

Mannie


.


Wednesday, October 12, 2011

Another Burnside Bridge Bench

Another nice garden bench in poplar and mahogany with the image of Burnside Bridge.


This bench commemmorates the sesquicentennial of the Battle of Antietam.


That's the battlefield in the distance with Captain Tomkins Rhode Island battery visible and South Mountain on the horizon.


As always, original art.


Here, the relief cuts on the legs zero right in on Tomkin's guns.


The bench as it appears today in the Park Bookstore


and, as it could appear in your garden.

Friday, August 26, 2011

Burnside Bridge Bookcase


My young friend Heather is heading off to college and I wanted to make her a special going away gift, something unique that I knew she would really like.


A bookcase of a manageable size seemed just the ticket for all of her dictionaries, thesauri, style guides, etc.  To make the whole thing perfect for her I would add a design element reflective of something that I know is dear to her heart.

More on that in a moment.

I also wanted to incorporate into the cabinet something dear to my heart and essential to any young person with a gifted imagination...


a secret compartment!

The design motif that I wanted to incorporate is Burnside Bridge at Antietam National Battlefield, where Heather and I have worked for several years now.  The bridge is special to everyone but especially so to Heather.


This is Burnside Bridge one foggy morning as the mist rises up from Antietam Creek.  These multi-arch, buttressed stone bridges typify Washington County Maryland,  Some 32 of them were built between the 1820s and 1840s.  All but six of those bridges are still open to traffic today.

I've modeled Burnside Bridge several times in the past, and the place I started this time was with the turning of the buttresses on my wood lathe.  


This piece would be halved on my bandsaw to provide the two buttresses.


Here they are, glued to the bridge.


And here's the bridge clamped into place during the fitting process.


With a Rapidiograph pen and Prismacolor pencils I added the stonework.  What you see is all drawn on a piece of poplar.


The bridge, along with the sloped side panels provides more book storage on the top surface.


I oversprayed the artwork with clear acrylic and applied cherry stain and spar varnish to the rest of the clear pine cabinet.


Surveying the results made me realize that one day when Heather has a friend help her move this book case the natural place to grab it would be by the bridge.  And even though the bridge is screwed and glued into place, it seemed to me like an accident waiting to happen.  I subsequently cut crescent-shaped hand-holds into the side panels about a third of the way down from the top, a perfect balance point.

The result is both spiffy and unique.


And the secret compartment?   That's none of our concern.

Best of luck Heather!

Mannie


Thursday, August 25, 2011

Susan's Small Shelves

No sooner had I finished my Burnside Bridge bench than my wife Susan asked me if I'd make her a small bookshelf, very small in fact, something for bedside use.  I was happy to comply.  I chose to make her a bookcase and a valentine all in one.  This was on Tuesday.

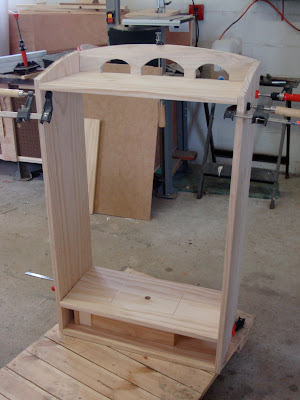
By Wednesday morning I had the carcass glued up.  Made in select pine with no blemishes, the cutting, and assembley went like a dream.  As usual the screws were hidden with pegs and a cherry stain was applied overall.


As with all of the smaller bookcases I'm making this one has ergonomic hand-holds cut into the sides for ease in moving it about.


To personalize it I designed an old-school Sailor Jerry-style tattoo on the top surface.

First, I inked it in with a Rapidiograph pen,


the ink flows nicely even on the stained surface.


Then I added color, as usual using Prismacolor pencils which are always a pleasure to use, the colow seems to flow on, is very controllable, it saturates and blends like a dream.


The results were very gratifying, this is the valentine part I was referring to.

As usual, the unit was glued, clamped and screwed with pegs flush-cut to cover the screws.


I cut the hand-holds in more of a novel shape this time.


                                      Three coats of Spar varnish and it was ready for delivery.


                                         Two and a half days from concept to finished product,
                                                        The customer was very pleased!

Staying handy,

Mannie


Under the influence

Every time I work in my shop my mind frequently turns to the three most influential people in getting me into that milieu of machinery and sawdust: My father, my friend Roger, and my shop teacher Mr. Hauck.


He was a patient. precise, and kind man, who brooked no foolishness in his woodshop classes.

In his classroom safety was paramount, and I don't recall a single injury under his tenure.  He eschewed lazy sanding and rewarded persistence.

I only took two classes from him; Shop I in my freshman year (1967), and Mechanical Drawing I in my senior year (1970).  Looking back, I have a tinge of regret at not taking more of his classes.

I'll always have a real appreciation for the men who have taught me the happiness, and satisfaction that can be found where metal  (and sandpaper!) contacts wood.

Thanks guys!

Mannie