And it gets better with each passing day!
Showing posts with label wood shop. Show all posts
Showing posts with label wood shop. Show all posts
Thursday, March 3, 2011


Tuesday, February 22, 2011
Art Deco tool stand
I took delivery on a new mortising machine two weeks ago. This may be the last major piece of machinery that will come through the front door of Victory Wood Working. With this powerful tool I can drill square holes.


All I need now is a little King Kong clutching a diminutive Fay Wray scrambling to the top.


Making the chips fly,
Mannie

How 'bout them apples? The magic is done by driving a hollow square chisel containing a rotating auger into a piece of wood. It's pretty cool and will allow me to quickly and accurately make mortise and tenon joinery in my furniture projects.
Every large tool such as this needs a bench or stand to anchor it on for stability. What I've been using are these machinery stands which I get from Sears:

They work just fine, though they aren't particularly attractive and certainly add nothing to the 1942 theme of my shop. So I decided to use this opportunity to start making my own machinery stands with a period look.

Two-by-fours, sheet MDF, and 5/8" plywood, mostly on-hand, were dragooned to get the project underway. For stability I filled the base with several pounds of ceramic tile that I've had lying around waiting for something to do.

Here's the stand carcass with the mortiser in place. Generally, I make wooden tool lockers for all of my major machines, this time, however, I used the opportunity to build one right into the pedestal itself. The pedestal is also the same size as my shop trolleys which can act as "wings" for this stand.
So, here comes the "design-ey" part...

Chevrons and stacked vertical buttresses provide classic art deco lines. Here, primed and ready to paint in a two-tone green scheme (like the rest of the shop).

I installed the door with classic (and simple) kitchen cabinet hinges with a little wooden ball as an elegant little pull.

The chisels, attachments, and tools have plenty of breathing room. This is also a perfect place to store the operating manual.

All I need now is a little King Kong clutching a diminutive Fay Wray scrambling to the top.

Making the chips fly,
Mannie
Monday, January 17, 2011
January Commission
What's the perfect thing to make for an old Navy Chief Petty Officer...other than a cup of coffee?
This custom bench will provide a perch for that retired CPO come this Fathers Day, thanks to his devoted wife (and my valued customer).


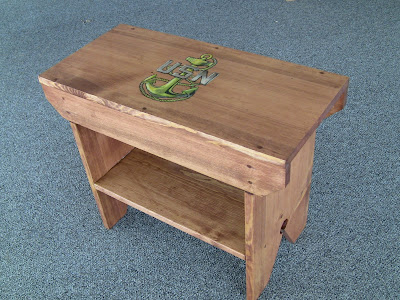
This custom bench will provide a perch for that retired CPO come this Fathers Day, thanks to his devoted wife (and my valued customer).

She requested a custom design drawn on the seat as well as a shelf below for incidentals,
and I was happy to oblige.

The "fouled anchor" is the hat and collar insignia of the Navy Chief, I rendered it in color pencil.

The shelf is a variation that's both utilitarian and pleasing to the eye.

Three coats of spar-varnish has it shipshape and ready for any weather, though I do recommend that folks bring their benches inside during the winter time.
Delivery was today, with all hands quite delighted with the result.
Anchors aweigh!
Mannie
Maple + Cherry = flaky crust
Here's a humbling reminder from the shop that wood does, in fact, grow on trees.

Early this spring my brother gave me an assortment of two-inch limbs he'd trimmed from a maple tree. I cut them into usable lengths, waxed the ends (to prevent checking), stored them in a dry place to wait until the moisture left them.

Along comes my friend Alann who asked me to make a rolling pin for his mother's birthday, and out came the maple, off came the wax, and into the lathe went this nice 18-incher.

This piece locked up really nicely. It was a really clean piece that turned like a dream.

Maple has a distinctively sweet smell as you turn it.

Starting at a 60 grit and ending up at a 220 grit, it sanded up nicely.

Dowels await the turning of a pair of cherry handles.

Finished, with an "old school" tattoo design, this rolling pin is destined for a collection rather than a kitchen drawer. I'm still hoping though, for a slice of apple pie.
Sunday, January 16, 2011
The five-board bench.
Here's a project that I've been wanting to get to, and once I got to it I was surprised at how fast it all went together. This five-board bench design is a classic and was used extensively by both sides during the American Civil War.

Using some 11 1/2 inch pine planks that I recently salvaged from a friend's barn I sawed, shaped, and sanded the five pieces in no time. Glued, clamped, nailed (minimally), stained, this project took just under two hours at a very relaxed ("where'd I leave my diet Pepsi?") pace.

This is the bench with the first coat of stain, as yet not rubbed down with steel wool, which I'll do in a couple of days. I chose to stain this rather than paint it only because the pine is beat-up in a way that gives it quite a bit of character, its also riddled with powder-post beetle holes which would have been filled in with paint. I'll be making more of these, I'm sure. Subsequent numbers will be pegged rather than nailed and painted in a variety of colors, depending on what I have lying around.
Whether used to accommodate behinds, flowerpots, drinks, or even books this handsome little table was a delight to make and a joy to behold. I'll be making a few more of these, I'm sure.
Mannie
Traditional benches and designs
The bench-building continues at a brisk pace. I'm taking advantage of my last free week before returning to taking classes to knock out some knockout projects.
After recently seeing a delightful documentary on old-school tattoo artist Norman Collins, better known as "Sailor Jerry" I was inspired to bring a little more color to my bench project.

I've already made five of these classic American benches, the first batch finished very plainly and the second (gifts for my sweetie) were decorated with routing, woodburning, and color.
I wanted to bring a little more design to the five-board benches I'd been making.

On this latest batch of four the relief cuts on the legs are valentine hearts rather than simple holes. I used a hole saw on my drill press followed by a band saw operation to make these little hearts.

The second variation was the brace between the legs, what I'm calling the 1/2 board in my "five and a half board benches". These are the fully assembled benches awaiting staining, decoration, and varnishing.

This bench is a gift for two very good friends who raise chickens - as pets, so I thought I'd start with a very generic hen outline and then spruce it up a little.
Using a wide range of Prismacolor pencils I came up with this fanciful creation which I call...

the Chilean Goldenback. Needless to say, It was very well received by my friends this afternoon.
Then next one was for me, very much a tattoo and very much a nod to my time (tattooless time) in the U.S. Navy.

This is a faithful copy of a classic Sailor Jerry design.
The Prismacolors are remarkably vivid on wood and I'm really pleased with the result.
The next bench, or "tattoo bench" as I'm calling them, is also based upon a Sailor Jerry design though with my own variations. That's my little mountain home in the center of the valentine with the Cumberland Valley in the background. Sunset around these parts looks remarkably like the drawing.

I think the bench reflects the happiness of the couple who live in that little house.

After two coats of spar varnish the image is locked in and smudge proof. Again, I'm really pleased with the effect of the colored pencils on stained wood.

What a satisfying way to close out the summer. Now I have all winter to plan new projects for the springtime.
Check in again,
Mannie
Library Step
This one with a Civil War motif for a friend's library:

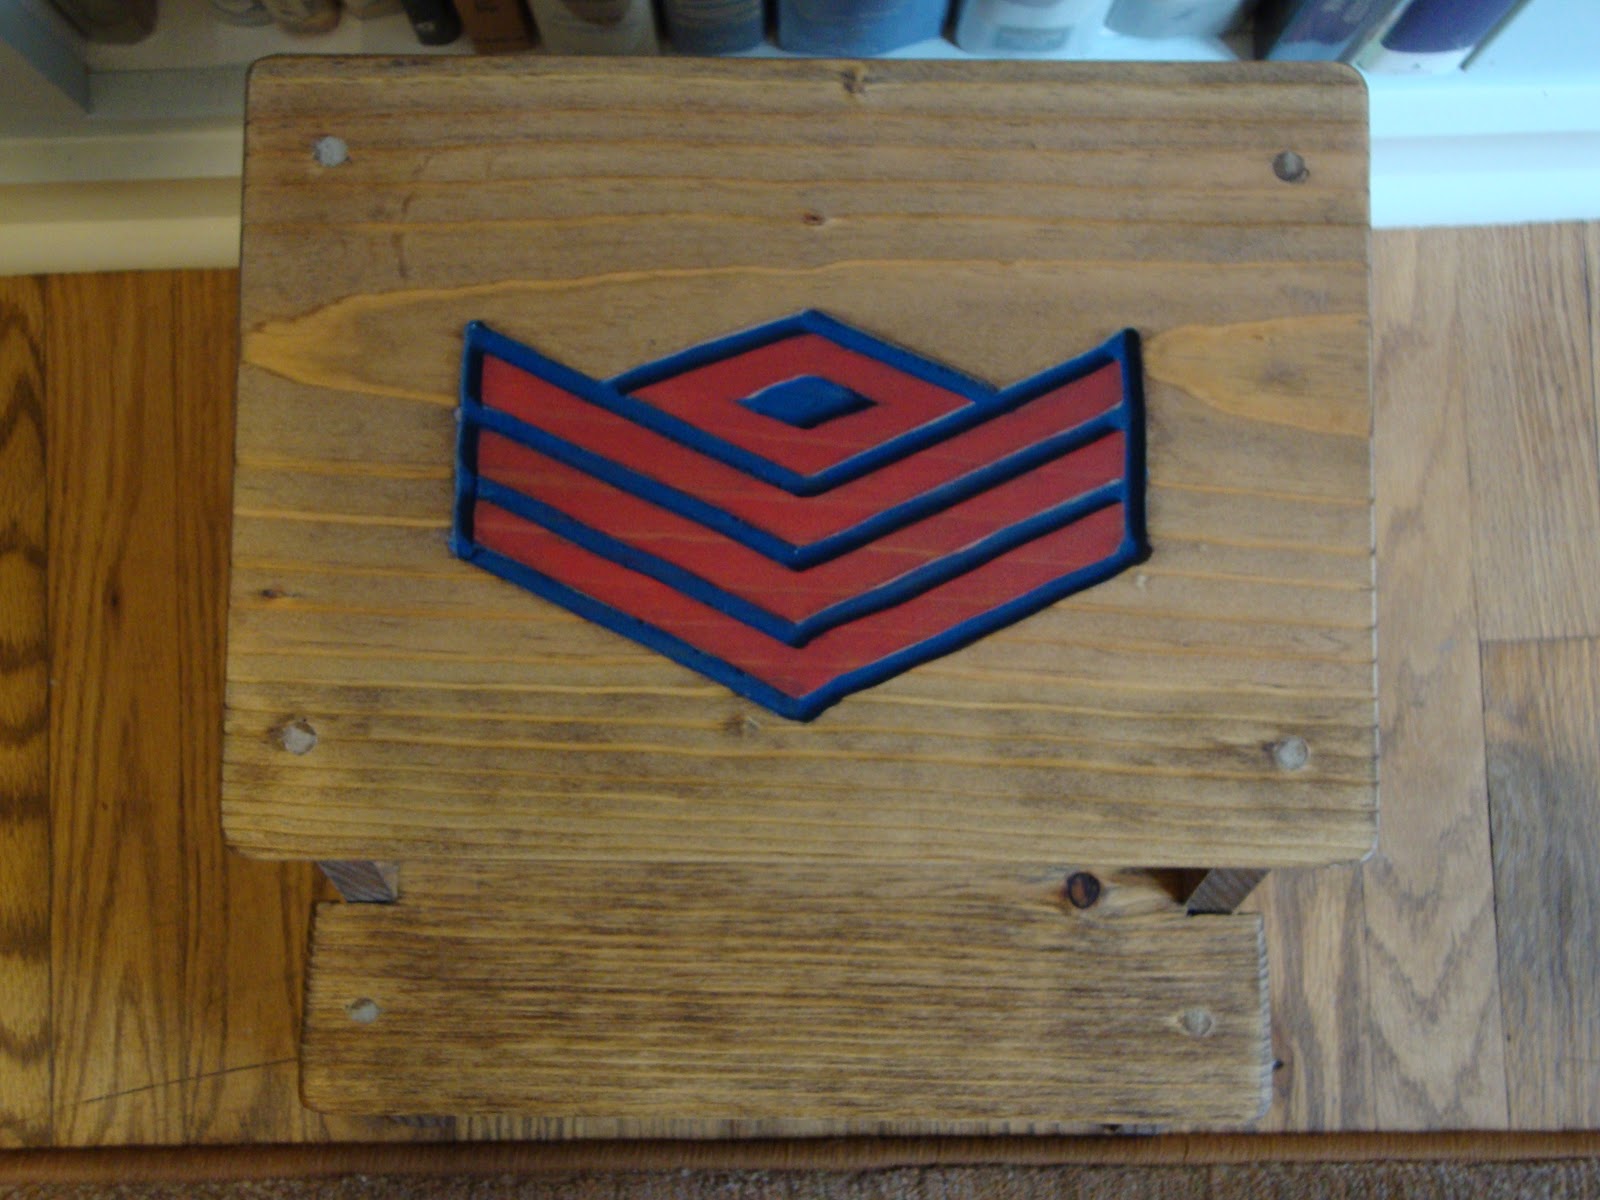

This "Arts and Crafts" movement design is really well-suited to a shop like mine. The pieces tend to be elegant (in their simplicity), very straight forward with evident joinery. I was influenced by this style of design as it was the spell my father was under in his high school vocational arts classes of the 1930s.
I love the whole Roycrofter thing.

I wonder, what will be next?
Saturday, January 15, 2011
Another fine day in the shop
A Portmanteau in pine poplar and plywood.
Yesterday was not such a good day, but today...
I was up and out in the shop by 8:00 a.m. as I had a project that I wanted to do. For some time I've wanted a shop trolley, a cart, to move production pieces from one machine to another. There's nice carts out there but generally they're made of some sort of petroleum product and cost a lot of money. Also they're just carts. I wanted something with some versatility. So with some poplar and particle board I got busy on what began as a very chilly morning at Victory Wood Working.

This is the frame for the top portion, glued, clamped, and screwed and cut to exactly the space between the arms of my table saw. hmmmm...

The table saw is the most often used machine in my shop, however when cutting really long or wide pieces of dimensional lumber or big panels there's often not enough table surface to support the stock that I'm trying to cut.

The second rule of woodworking is that you can't have too many clamps. This is the top portion of the trolley with the lower surface in place and the supports glued and clamped that will accommodate the flush top panel. I have a plan in my head.

A counter-sink is a handy tool to use with your drill. Drilling and countersinking screwsholes will look much nicer and a drilled and countersunk hole, even so near the end of the work, won't split on you.

As the glued-up top portion dried I built the bottom portion. I mounted the casters into two-by-sixes, both for the bulk of wood to support the caster screws as well as for the added weight at the very bottom of the trolley, which will make it very stable.

Looking very gnome-like, Im connecting the top and bottom portions of the trolley by clamping, glueing, and screwing the legs into place.

And viola! as my beloved French people say. Rolled into place quite snugly between the rip-fence arms of my table saw this trolley surface, perfectly flush, provides a mobile but very stable two-by-two foot extension for my saw. It can be used on either side and also to the rear of the saw to support stock being sawed (sawn?). Note the grasping handles milled into the sides. That top lifts off to reveal...

The parts trolley. A clean spacious, and lipped surface, handy for transporting production pieces to various machine stations throughout the shop.

Another satisfying, safe, fun, and productive day at Victory Wood Working. Have I mentioned how glad I am to have built this wonderful shop?
Making the chips fly,
Mannie
Wednesday, June 30, 2010
I've been in a frenzy of making benches. I came across a nice pattern for traditional five-board benches and immediately made four of them, out of salvaged lumber, one of which I gave to a friend for his garden.

Benches, I discovered made nice gifts, and as my sweetie had a birthday coming up (yesterday) I set about to make a pair of "higher-end" five-board benches with some Arts and Crafts influence.

And they came out pretty nice


I also wanted to decorate them. Using my soldering iron...

I burned this scene of blackbirds on a limb into the first.
Into the second one I routed a traditional Roycroft design, in this case, Dard Hunter's beautiful
geometric roses.

The Dremel Trio (a new purchase) really expedited the process.

Side-by-side the slight variations in construction are apparent.

I colored the roses with watered down acrylic paint,

and followed that with six coats of spar-varnish...

which locked in the color and weatherproofed the benches.

The result was both pretty to look at...

and well received by the birthday girl.
Subscribe to:
Posts (Atom)